What you need:
- The printer, its power supply and an ethernet cable (A supported printer)
- A roll of 80 mm thermal paper
- A power outlet and a network port where you bag orders
- A phone or laptop on the same network as the printer
1. Plug the printer in
Load the paper roll and close the lid. Connect the power supply, then run an ethernet cable from the printer to your store's network. Some models can use Wi-Fi, but a cable is far more reliable, so use one if you can.
2. Get your printer link from Buddi
In Buddi, open Store Settings, then Printer Settings, then Add printer. Give it a name you will recognise, such as Front counter.
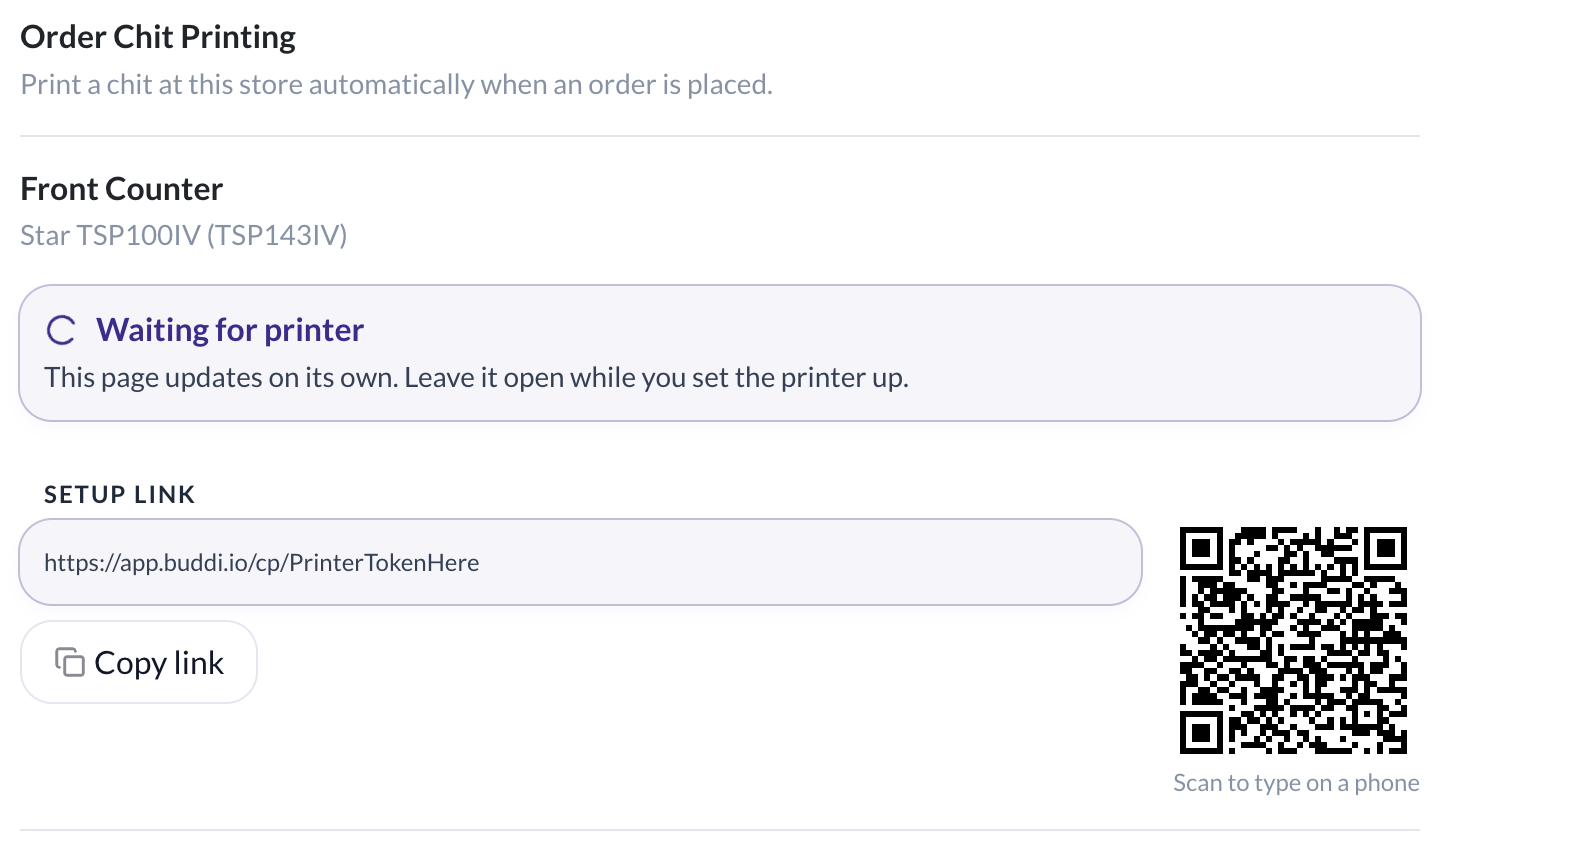
Buddi shows you a web link and a QR code. Scan the QR code with your phone so you do not have to type the link out by hand. Leave this screen open, you come back to it at the end.
3. Find the printer's address
Switch the printer off, hold down the FEED button, and switch it back on. It prints a sheet of its own settings.
Find the line labelled IP Address and write that number down. It looks like 192.162.1.49.
4. Open the printer's settings page
On the same phone or laptop, type http:// followed by that number into your browser. It has to be http, not https, or the page may not load.
Sign in with the user name root and the password public.
Write the new password down. The printer makes you choose a new password straight away. Keep it somewhere you will find it again. If nobody remembers it later, the printer has to be reset to factory settings before anything can be changed.
5. Turn on order printing
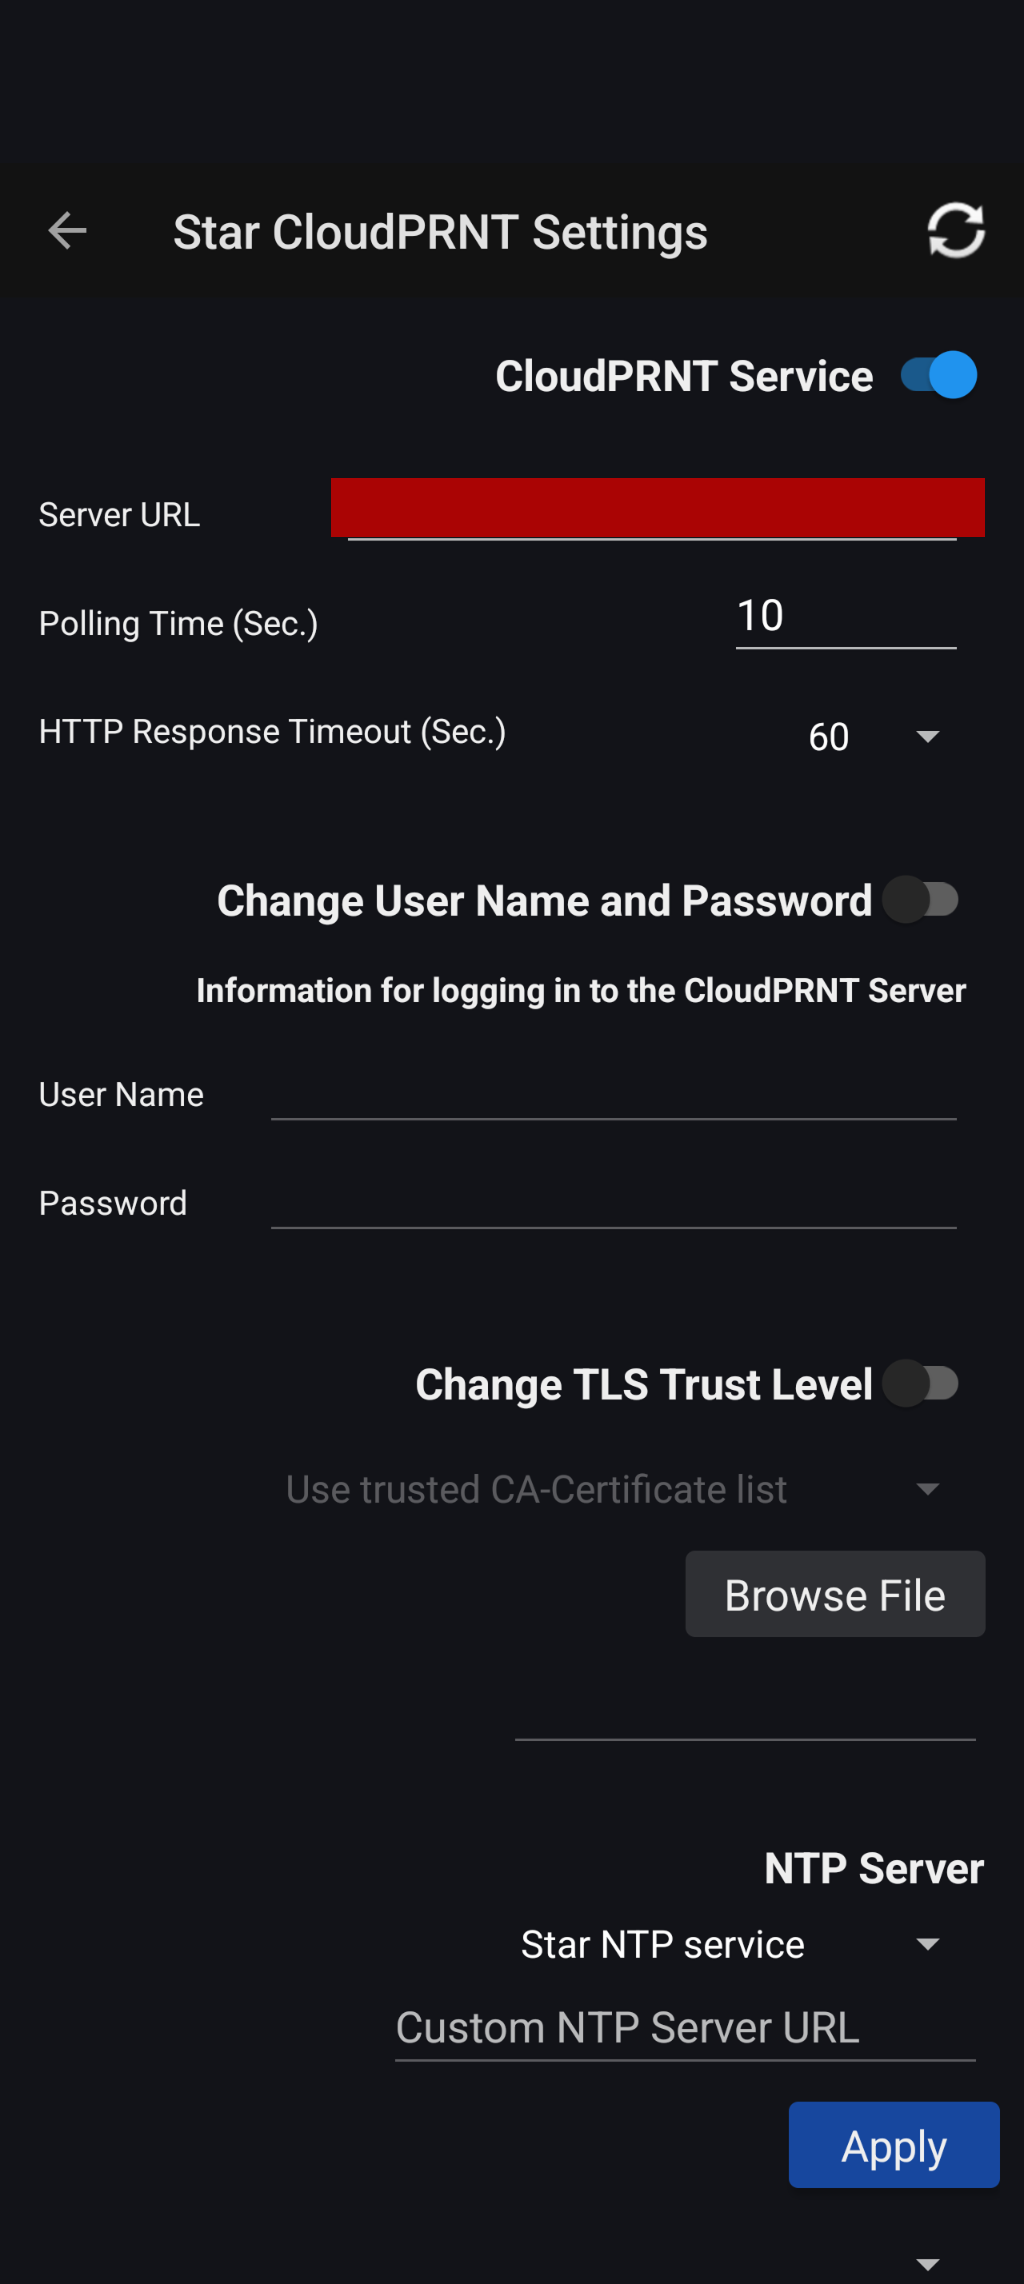
Find CloudPRNT in the printer's menu, then fill in these four things and leave everything else alone.
Setting | What to enter |
CloudPRNT Service | ENABLE |
Server URL | Your link from step 2 |
Polling time | 10 |
User Name | leave blank |
Password | leave blank |
The security and certificate settings further down the page are already correct. You do not need to touch them.
Wording varies a little between printer models. If a label on yours reads slightly differently, match it to the closest one above.
6. Save and restart
Press Submit. The printer shows a confirmation screen, but nothing has actually been saved yet.
Now open Save from the menu, choose the option that saves and restarts the printer, and run it.
This is the step people miss. Submit on its own changes nothing. If you stop here, everything you typed is thrown away when you close the page and the printer will never print.
7. Check it worked
Go back to the Buddi screen you left open. Within a few seconds it changes from Waiting for printer to Connected.
Press Print test chit and check that paper comes out. That is everything. From now on your orders print on their own as they come in.
If nothing prints
Did you save and restart?
Submit on its own does not save anything. Go back to step 6 and finish it.
Is the link exactly right?
One wrong character and the printer can never connect. Scan the QR code rather than typing it.
Are both blank?
User Name and Password on the CloudPRNT screen stay empty. Your printer password does not go there.
Was this article helpful?
That’s Great!
Thank you for your feedback
Sorry! We couldn't be helpful
Thank you for your feedback
Feedback sent
We appreciate your effort and will try to fix the article